I recently bought the Ninja Blender with Auto IQ, model BN701, and I have to admit, at first, it felt a bit like adopting a furry, four-legged, complex creature. The buttons, the modes, the Auto IQ feature – it was all overwhelming.
But here’s the twist: I’ve cracked the code, and now, I’m excited to share my newfound wisdom. In this journey, I’ll share how to use the Ninja Blender Auto IQ for you so you won’t have to go through the head-scratching phase I did. Get ready to turn your blending woes into blending wows!
The Product on Trial: What Ninja Auto IQ Blender I am Using?
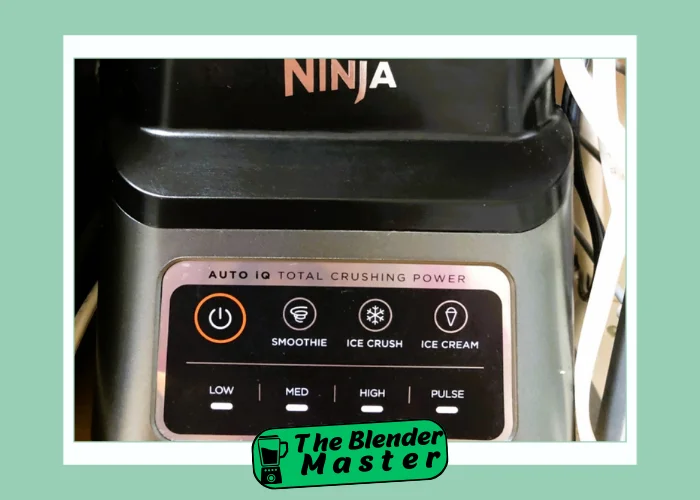
As I have mentioned earlier, I am using Ninja BN701 Professional Plus Blender with Auto IQ.
With 1400 Peak Watts of power, this incredible blender offers not one, not two, but three unique functions: smoothies, frozen drinks, and ice cream.
And as if that wasn’t enough, it also comes with an Auto IQ feature that takes your blending experience to a whole new level.
Now, let’s take a look at what Auto IQ is and why it is so hyped.
What is Auto IQ Setting?
The Auto IQ setting in a Ninja Blender is like having your own personal smoothie-making genius at your fingertips. It’s the brain behind the blending brawn!
Think of it as your blender’s superpower. Auto IQ technology takes the guesswork out of creating the perfect drink. No more scratching your head and wondering, “How long should I blend this for? Is it done yet?” Nope, with Auto IQ, you’re in good hands.
This feature uses intelligent programs that follow a precise sequence of timed pulsing, blending, and pausing patterns. It’s like a dance routine for your blender but way cooler. These patterns are specifically designed to handle different ingredients and recipes, making your life in the kitchen a lot easier.
Want it a funny way?
Auto IQ is like having a blending master right in your kitchen (like me), making your blending easier and more enjoyable.
Right auto IQ settings
Selecting the perfect Auto IQ setting on your Ninja blender is like picking the right outfit for a special occasion – it sets the tone for a smashing blend! Let’s dive into some tips on how to make the right choice without breaking a sweat:
- Recipe Guide Wisdom: Your Ninja Auto IQ Blender often comes with a recipe guide, and it’s not just for show! Please take a peek at it to get some inspiration and solid advice on which Auto IQ setting to go for. It’s like having a blending guru whisper in your ear.
- Know Your Ingredients: Ingredients can be a picky bunch, and they each have their own demands. Think of it like babysitting a group of unruly kids – some need gentle care, while others require a little more muscle. Leafy greens might want a delicate blend, but ice and nuts, well, they demand the strong stuff. So, consider the ingredients you’re working with.
- Get Hands-On: Sometimes, you want to be the boss, right? Ninja Auto IQ Blenders usually come with a manual mode, giving you the power to call the shots. If you’re the creative type, feel free to tinker with blending speed and duration to get the blend that suits your taste.
- Default: Your Safe Bet: If all else fails, remember, there’s a trusty default setting. It’s like your blender’s go-to move. This setting is designed to be a crowd-pleaser, working well with most recipes and ingredients. You can’t go wrong with it.
- Observe and Tweak: As the blending spectacle unfolds, keep a close eye on the show. If your blend’s too thick, be the hero – add some liquid. If it’s too thin, come to the rescue with more ingredients. Then, hit the blender play button again until you’ve got the mix just right.
So, don’t stress about choosing the right Auto IQ setting. It’s all about having fun, experimenting, and discovering your blend-tastic preferences.
Operating the Ninja auto IQ blender: Here’s a step-by-step guide
Now that you guys know what Auto IQ is and what the correct setting it’s time to operate. Operating your Ninja Auto IQ Blender is a piece of cake – just like making a cake, but without the baking part.
Step 1
Lock and Load: First, make sure your pitcher or cup is locked and loaded onto the base unit. You don’t want any unexpected blender acrobatics!
Step 2
Fill ‘Er Up: Now, toss in your prepped ingredients. Remember the layering technique we talked about? Soft stuff goes in first and then piles on the tough ingredients. It’s like making a cosy sandwich but with veggies and fruits.
Step 3
Auto IQ Magic: If you’re using the Auto IQ settings, just hit the button for the magic you want. These settings are like your blender’s secret handshakes. They know exactly what to do based on the program you choose.
Step 4
Manual Mode Maestro: Or, if you’re feeling like the captain of the blender ship, go manual. Start slow and crank it up as you see fit. Check your user manual for specific speed settings. It’s like DJing for your blender!
Step 5
Blend It Like You Mean It: Let the blender do its thing until your mix hits that perfect harmony. Auto IQ settings will stop the blender automatically. In manual mode, you’re the boss – stop when you’re happy with the results.
Step 6
Safety First: Once the blend-tastic performance is over, carefully take off the pitcher or cup. Watch those blades – they’re sharper than a ninja’s sword!
Step 7
Pour & Savor: Pour your blended masterpiece into your favorite container, and it’s time to enjoy the fruits of your blender’s labor. Cheers to deliciousness!
TIPS:
Remember, not all blends are created equal. Keep an eye on the blend as it whirls – adjust time and speed if needed. When in doubt, start with a shorter blend and ramp it up as you go.
Recommended Reading: How To Clean Ninja Blender: A Simple But Handful Guide
Benefits of Auto IQ settings
Have you ever wondered what’s the fuss about those Auto IQ settings on your Ninja blender? Well, get ready to be wowed because these settings are like the superhero squad of your blending adventures.
Here’s why they’re the bee’s knees:
- No More Brain Strain: Auto IQ takes the guesswork out of blending. It’s like having a magical blend button for every recipe. There is no need to become a smoothie scientist – pick the right program and let your blender do its thing.
- Perfect Consistency, Every Time: Want your smoothie to be as smooth as silk or your salsa to have that just-right chunkiness? Auto IQ settings are here to deliver. They’ve got the secret handshake to get your blend to that sweet spot.
- Time-Saving Sorcery: In a rush? Auto IQ gets the job done faster than you can say “blend.” It knows exactly how long your ingredients need to dance in the blender for a flawless performance.
- Mess-Free Magic: Tired of stopping and starting to scrape the sides of the pitcher? Auto IQ knows when to pause, pulse, and blend, so there’s no need to babysit your blender. It’s like having your very own kitchen helper.
- Recipe Guru: Auto IQ settings often come with recommended programs for specific recipes. It’s like having a culinary coach on speed dial. Just follow their lead, and your dishes will turn out amazing.
- Easy Peasy: Remembering specific speeds and times for different recipes? Ain’t nobody got time for that. Auto IQ settings simplify everything. It’s like your blender’s way of saying, “Don’t worry, I got this!”
So, next time you’re whipping up a delicious smoothie, soup, or dip, don’t forget to enlist the help of those Auto IQ settings.
Recommended Reading: How To Turn On Ninja Blender: Learn and Blend
What I’ve Made With It?
Alright, let’s spill the beans on what I’ve been cooking up with my trusty Ninja blender. I decided to shake things up in the kitchen, ditch my usual routine, and see what this bad boy could do. Here’s the scoop:
Chop it like it’s hot:
First, I went all in with the Chop function and whipped up a twist on a salsa verde recipe. Let me tell you, it was a flavor explosion! The blender’s quick and precise blending style left those ingredients just the way I wanted – not too pureed, just right. Even those pesky herbs like chives and cilantro couldn’t escape its blending prowess.
Extract some magic:
Since I had a salsa surplus, why not make a pear-ginger-citrus juice using the Extract function? That blend was as loud as a rock concert, but it pulverized the pear and ginger like a champ. It’s not a full-fledged juicer, but the result was more juice than smoothie. Another win in my blender diary!
Smoothie surprise:
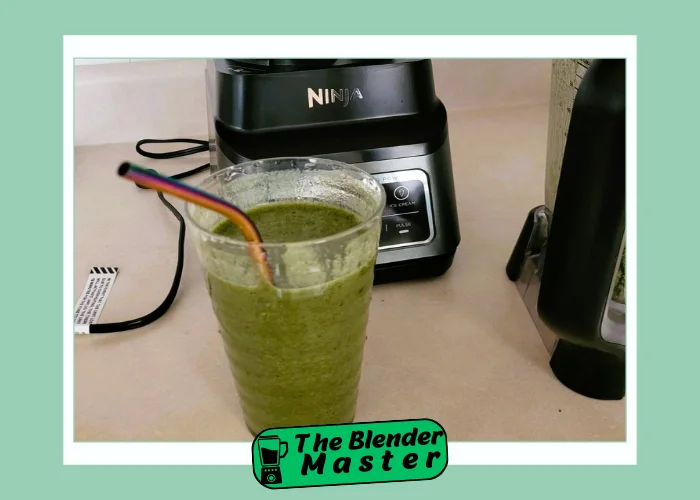
On day three, I decided to test the Smoothie function with a frozen spinach-banana-chia-seed combo in the single-serve cup. Here’s where I hit a minor bump. Unlike my Vitamix with its tamper, the Ninja can’t stir ingredients on its own. So, I had to play the superhero and give it a little wiggle before resuming the blend. I’m putting this down to a rookie move, but hey, it’s good to know if you’re into chunky, gummy smoothies!
Cool as ice:
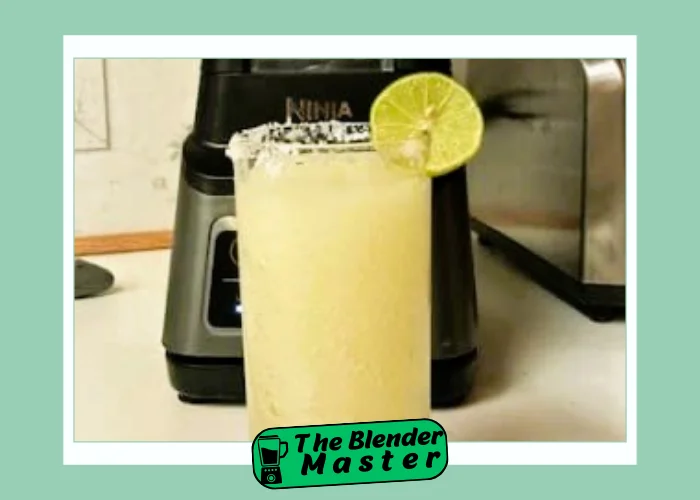
Feeling the heat and dreaming of summer, I tried the Ice Crush function to whip up an ananas melon snow cone. You can almost smell the beach, right? Well, this one had a learning curve too. A few pieces got stuck during the blend, but a quick pause and a stir, and I was back in business, sipping my fruity concoction before it turned into a pool.
If you are into frozen fruit recipes, I have written an extensive roundup guide about the best frozen fruit blenders in 2024! Check it out here for more blending inspiration and top-notch blender recommendations.
I’ve dabbled in salsas, juicing, smoothies, and summer treats, all thanks to my trusty Ninja blender. What’s next on the menu? Who knows, but one thing’s for sure: it’s going to be a tasty adventure!
Recommended Reading: How To Sharpen Ninja Blender Blades: Learn And Sharpen
Conclusion
I’ve gotta say, this blender is the bomb. It’s like the superhero of the kitchen, ready to tackle any blending mission you throw at it. The Auto IQ settings are like having your own personal blending wizard, making your life easier and your recipes tastier.
I guess after reading this, you are now a Ninja Blender Pro user and mastered the Auto IQ settings. It’s time to say goodbye. Happy blending, my friends!
Leave a Reply